DIY Concentric Port
A concentric port is basically a straight port that has been collapsed into itself. Hold a cardboard tube out in front of you, and run as fast as you can into a brick wall and you'll get the idea!. A three-layer test port was made which required some custom diameter pipe, so a technique for making composite tubes from two layers was also developed
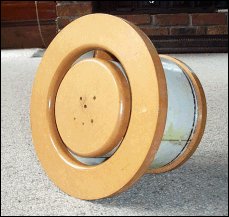
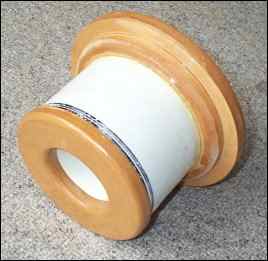
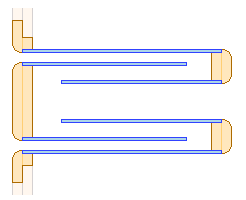
Building it
See all the pictures in The build gallery
Testing it
A 50 litre test box was built as a cube to keep all the box resonances at a single known frequency (447hz). Two 10 inch holes were made - one for the port and one for the driver. The small length of the test port meant that the port resonance was expected at 573hz. This is well above what a subwoofer driver would go to, so a set of computer speakers was butchered to supply a midrange driver and its amplifier. The driver was mounted on a 10inch disk.
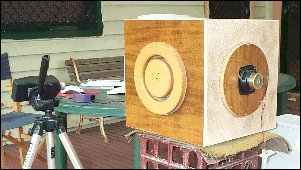
A closed piece of pipe filled with damping wool was needed to contain the backwave of the driver
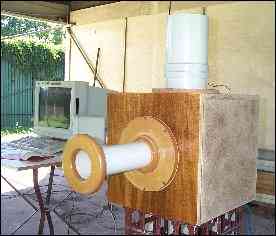
Port Resonance testing
An SPL meter was mounted close to the port, and then with a signal of 570hz (predicted port resonant frequency), exciting the port, the meter was moved backwards and forward till the highest response was detected. This was to avoid being in a "null" for the very frequencies that were of most interest.
With the standard port installed, SPL readings were taken from 400hz to 680hz in 5hz steps. The concentric port (with damping pads) was then fitted and the measurements taken again. The pads were then removed and the concentric port re-tested.
The tests showed that strength of the port resonance was not diminished by using the concentric port...
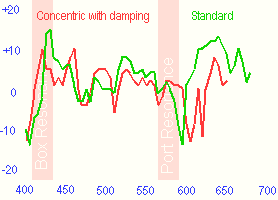
The fitting of foam damping to the endcaps did not improve the situaton
Chuff testing
The midrange driver assembly was replaced with a subwoofer driver and powered with the 350w amp used
in the "Blast Furnace". The standard port was fitted and a test passage containing 30hz content
was played at increasing levels until "Chuffing" became evident.
With the controls left unchanged, the standard port was replaced with the concentric port and the passage played again.
The results were immediately apparrent. Total Disaster! The chuffing was so bad that I've renamed the new design
to "little piggy" as in the story of the three little pigs. (I'll huff and I'll puff .....)
Results
There appears to be no point in using this design in its current form. It may be possible to decrease the chuffing by using endcaps made on a lathe which could ease the air into a U-turn, rather than slamming it into a the cap at 90 degrees. I'll leave that up to other researchers....oh well, I had some fun!
All the maths will make your head explode!
If you actually do want your head to explode, you can check out The equations page which contains:
- The simple maths neglecting wall thickness
- The full maths
- Determining acoustic length
- Equations for a composite port tube
- Some suggested pipe sizes that can be used to make a concentric port
Concentric Port and Composite tube Calculator
Here is an easy to use calculator that does it all for you.
It works out the pipe lengths and end gaps for 3-layer and 5-layer ports.
It also works out the sizes for making a composite tube of any diameter.
Input the size of the small tube and the wall thicknesses and it does the rest.
Play around with different wall sizes to arrive at the sizes you want.
If you are unable to source a pipe of a particular size, you can make it out of 2 layers of PVC pipe.
The software has an extra utility which will help you to work out how much to cut out.
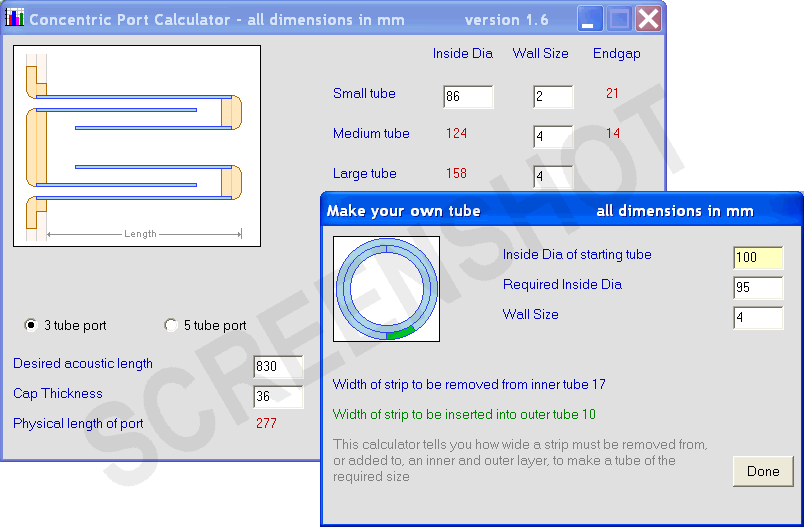
Features of current version - V1.6
- Determine the diameter and endgap for each tube in a concentric port
- Design either 3-tube of 5-tube ports
- Design composite tubes of two layers of pipe
- Only works in mm - aplogies to UK and USA coneheads..
Concentric.exe is written in Visual Basic 6 and runs under Windows.
Security information:
Filesize 65,536 bytes
If you find this calculator useful, you might like to share the love
