Buddy Subs
When I heard that my supplier was dropping my favorite driver from its lineup,
I bought 4 at a good price. Since they are currently sitting around doing nothing,
I thought I could use a pair of them in conjunction with my existing sub to get an extended bottom end.
A pair of "Buddy Subs" in series, placed in parallel with the Blast Furnace
gives a total load of 4 ohms, which utilises the full 350w that the amp can deliver.
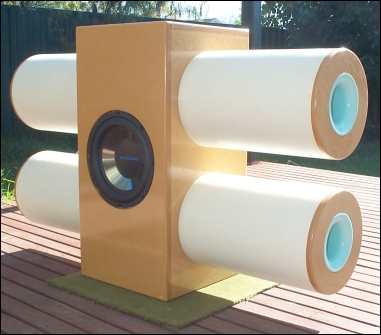
- Single 10 inch Jaycar CS-2274 Driver
- Slaved off existing 350W (4ohm) Jaycar AMP
- 110 Litre enclosure 700H * 340D * 1140W
- Tuning Frequency 19 Hz
- Twin 86mm ports
- Weight per Buddy: 35kg - 77lb
According to WinISD, extension to 17hz can be attained with 110 litres, 19hz tuning.
With the load spread across 4 drivers, blocking one port of the Blast Furnace as per the
tuning study detailed on the Blast Furnace page, can be done without running into excursion problems.
This drops it's tuning frequency from 28hz down to 18hz
6 metres of 250mm PVC pipe was left over from the abortive concentric port experiments, so
some of the enclosure volume was made up using the pipe, giving an interesting box without spending heaps.
Four capped sections of pipe make "extension pods" which open into the box.
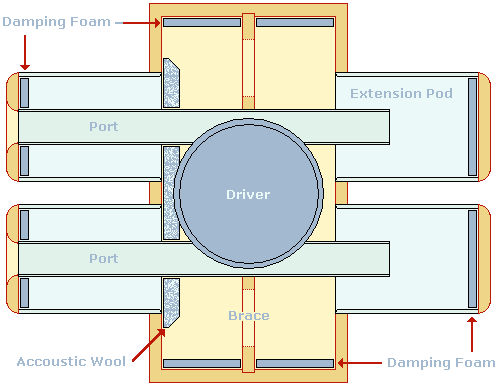
A pair of 86mm ports exit from the pods on one side. Whilst one sub is left firing and one is right firing,
they can be inverted, mounted side by side, or stacked, giving plenty of flexibilty for positioning.
A favorite location is to deliver the infrasonics straight into the corners of the room! With everything cranked up,
I have measured 107dB at the seating position for the famous Bath scene on the 'Constantine' DVD.- Finally met THX specs!
WinISD prediction of combined output
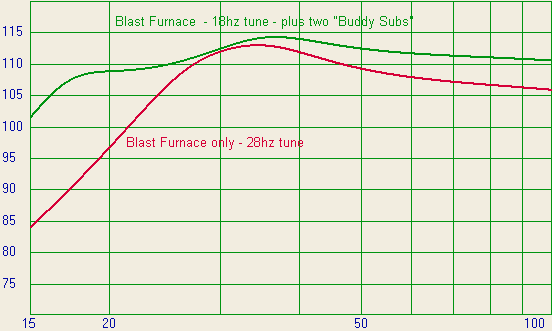
The graph is actually of a single box with 4 drivers / 350w amp, 350litres, 19hz tuning.
I do believe that in excess of 105dB @ 20hz qualifies for THX certification.
Just over 100dB @ 15hz isn't too shabby either!
I read somewhere that the resonant frequency of the human eyeball is around 19hz, so if any "ghosts" appear,
I'll know where they came from!
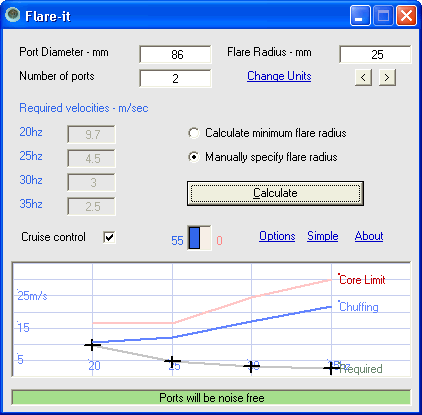
Both ends of the ports were originally flared by 10mm using a rollover bit in the router.
Since building these subs, I have conducted some flared port experiments and found that,
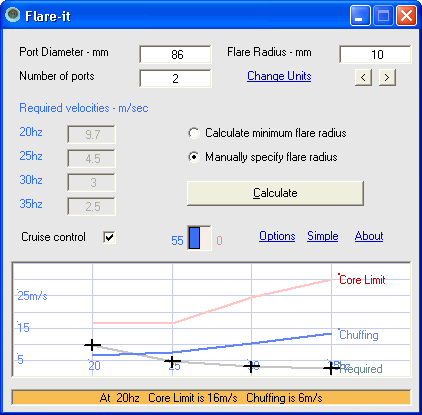
for the 9.7 m/sec airspeed generated, a flare of 10mm is too small.
As this Flare-it screenshot shows, there is only a small problem area below about 22hz when operating at full power.
Recently the drivers were temporarily removed for a test project, presenting the opportunity for some maintenance. The flares on the port exits were upgraded to 25mm heat molded. The small smoothing rings originally fitted to the ports were replaced by larger donut style rings, providing 13mm flared intakes. See the gallery for more detail. There's been no "chuffing" since.
Buddy Subs Gallery
Cutting brace
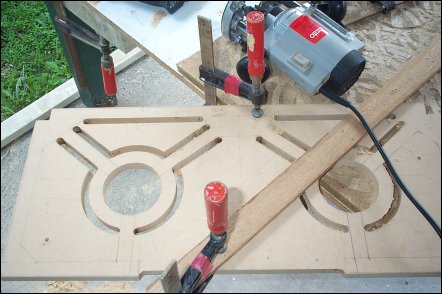
Cutting out the brace. With having to move the guide to route each cut, it takes about 1/2 day per brace
Brace finished
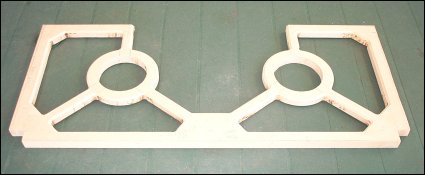
I reckon the brace is a work of art; - it's a pity this is the only place you will see it!
Brace view
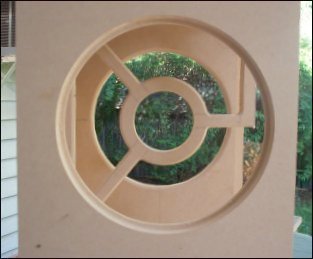
Hitchcock vertigo view of brace through opening for extension pods
Front panel removed
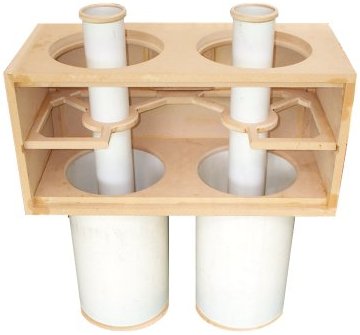
The speaker is on it's side in this shot, - the front panel, and a pair of pods have been removed to expose the port mounting detail. The brace is rebated into all four sides and when the front is glued on, will be quite strong, supporting the rear panel as well as the ports. The Smoothing rings fitted to the port intakes have since been upgraded to the larger "donut" style, providing a 13mm flare.
Sanded
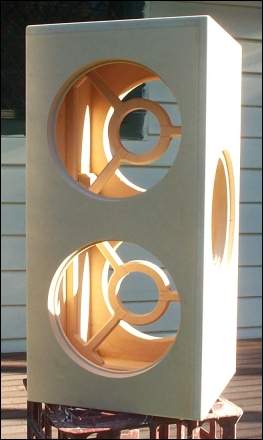
The main box sanded ready to seal. Sunset shot shows the range of colors you can get with MDF
Ready to seal
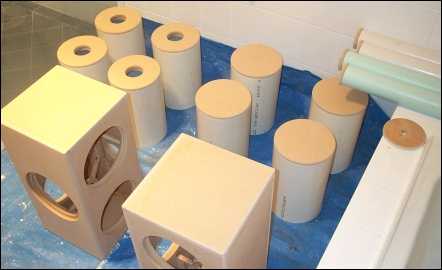
It takes all these pieces to make a pair of Buddy subs. All sanded and ready to seal with 3 coats of polyurethane. Yellow color is from the heat lamps in the bathroom - only place I had that was dust free
Foam rubber inserts

The long side to side dimension has a potential resonance of around 165hz. This needs taming, so foam rubber inserts were glued inside the endcaps of the extension pods. The foam used is a closed-cell type that works better than open-cell acoustic tiles for low frequencies
Smoothing rings

Close-up of the original smoothing rings installed on the port intakes to cut down on
"input head loss" and whistling. This shot and the next one were taken before the last of the extension pods
were glued into position.
Reminds me of the scene in "Master and Commander" when they rolled out the cannons!

It is that very film that has inspired this obsessive quest for infrasonic excess!
Port intake
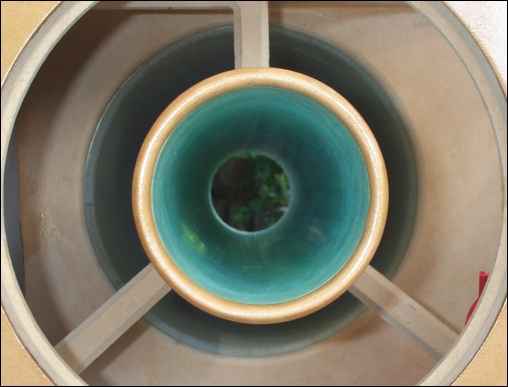
Warning: Do not stare directly into the port intake!
Front-on shot of intake shows rounded profile of original smoothing ring. Also just visible in the background is the rollover edge on the entrance to the extension pod.
Gasket
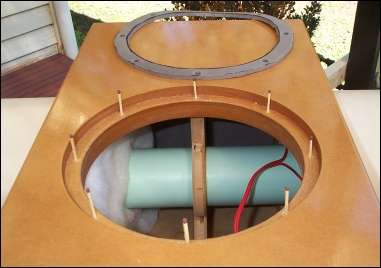
If you need to remove a driver, it is difficult to get a foam gasket to go back exactly into place. A smear of silicone will hold it onto the cabinet for you. Matchsticks can help you align it easily. Drop it on, remove matches and bolt in driver
Speaker Terminals
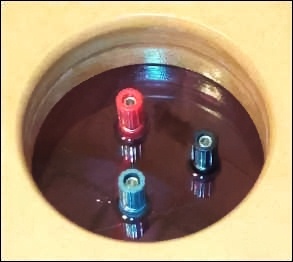
An MDF spacer made up to give the depth required to allow the speaker to lay on its back without damage to the terminals even if they are fully wound out. A router with a flush-trim bit is used to clean up the opening in the box, and a rollover bit gives a flare as per port openings
Postscript: The plastic binding posts turned out to be unable to handle being done up tightly. All-metal binding posts or Neutrik connectors will be used in future projects
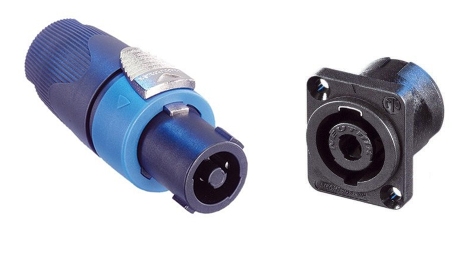
In future, I'll use these...
Here is a bit of discussion about finding quality binding posts at HTGuide
Completed
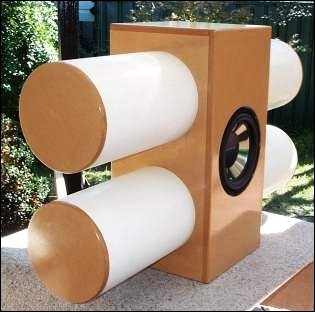
All completed - This is the quiet end. The port action takes place up the other end
Gathering of the clan....
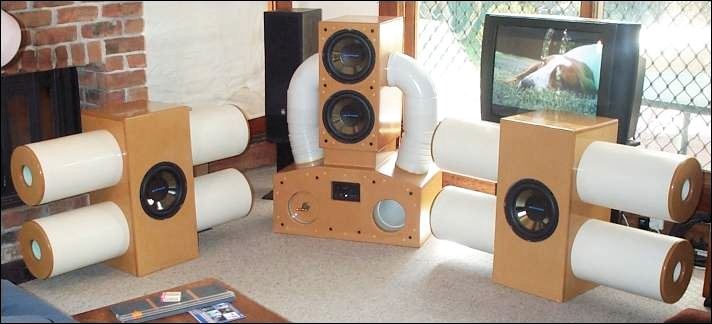
The whole system. Blast furnace plus two buddies.
The Blast furnace has one port blanked off to lower the tuning to 18hz. The buddies will tuck away behind the seating position in a desperate attempt to increase the SAF (Spouse Acceptance Factor). I later remove the blanking plug to recover the lost SPL - there is still plenty of "bottom end" to go round!
Port upgrade....
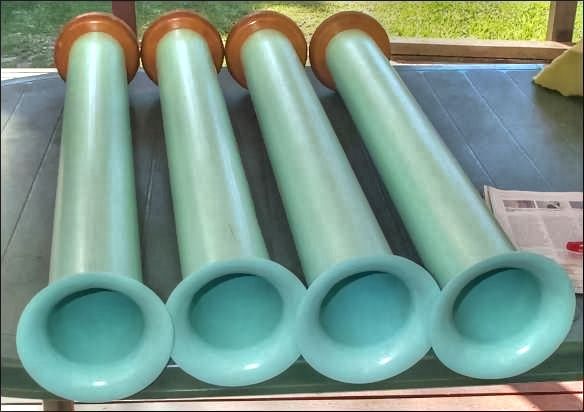
The upgraded ports
Four new port tubes were flared using the heat molded method. The flare radius has been increased from 10mm to 25mm - more than adequate to deal with the peak airflow.
Donuts....
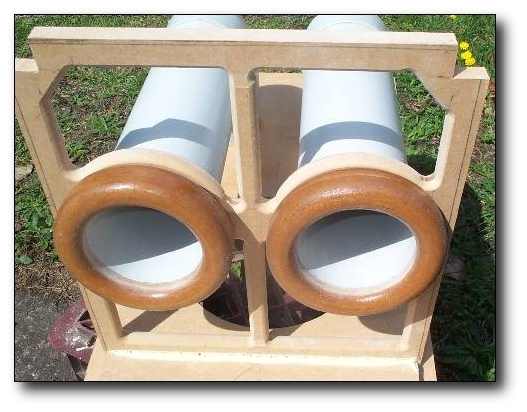
The intake end of the new ports
The new ports fitted with "donut" style smoothing rings, providing a 13mm flare to the port intakes. These are glued on after the new port tubes are fitted into the enclosures.
